Bird Spikes - Installation manual
Bird Spike Installation Manual
Bird Spikes are easy to install. Just follow these step by step instructions for a hassle free installation!
1. Assess the area to establish how many metres you require. A single row of bird spike will cover a ledge with a width of up to 15cm - 18cm. Some areas may need more than one row if they are very wide. Have a look at Hints and Tips #1 below for exact measuring instructions for wider areas, and also what to do if you have a very narrow ledge. If you are unsure of any areas, contact us and we will assist you step by step with advice on how to measure accurately so that you order the correct amount.
2. Give the area a good cleaning. This is so that the bird spikes will adhere to the surface firmly and also to ensure a healthy, clean environment for you to work in. A bucket of hot soapy water, gloves and a dust mask will do the trick. Once your bird deterrent spikes are installed, cleaning up after pest birds will be a thing of the past!
3. Once you have ordered your bird spikes, decide how much glue you will need. Your local hardware store will be able to assist you with a good, quality glue. We recommend using something like Patex No More Nails or similar. Use one 300ml tube per 20m-30m of spikes. Do not use silicone, as it will not last. You are now ready to attach the bird spikes! Simply apply a thin line of glue to the base of the spike.
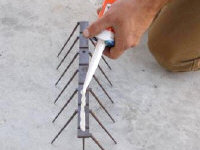
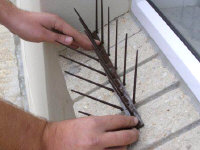
4. Press bird control spikes firmly onto the surface. Follow the glue manufacturer's instructions on waiting periods and pressure. Continue this process until all areas are covered.
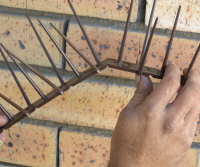
5. Always make sure the areas are well covered, allowing no place for birds to land. The spikes snap off easily for small areas.
6. To install bird spikes onto gutters: Always clip the gutter clips onto the spikes first. If necessary you can glue the clips on for added strength. Then simply clip the spikes onto the edge of the gutter. To remove the spike for cleaning of gutters, just pinch the clips and the spikes will come off. See our table below Hints and Tips #3 for how many gutter clips you need per length of spike.
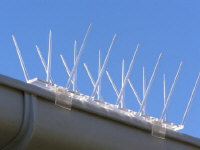
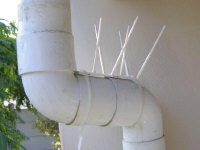
7. To install the bird spikes onto round pipes: Simply apply the glue to the spike as normal. For added strength you can secure it with cable ties.
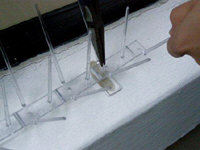
8. To install bird spike with the Remova-Clip: Simply clip the Remova-Clip onto the base of the spike and apply the glue onto the base of the Remova-Clip and press down firmly. See Table below Hints and Tips #4 for how many Remova-Clips you will need per length of spike.
HINTS AND TIPS FOR INSTALLING BIRDSPIKE
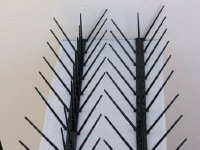
#1 What to do for a very wide ledge. If your surface is wider than 18cm, you will need a second row. You may allow a 2.5cm-5cm gap between each row. See photo of spikes on wide ledge with slight gap between rows. Do not allow any gaps between lengths of spikes as this can look patchy.
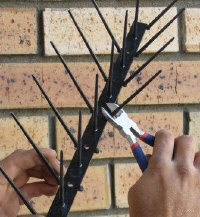
#2 What to do for a very narrow ledge. If the width of the area is as narrow as 10 centimetres, or less, BirdSpike is completely versatile. Simply cut the spikes off one side to fit.
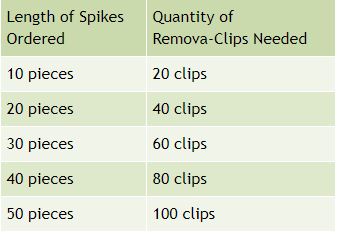
#3 Use the table above to calculate the amount of Gutter Clips or Remova-Clips needed for installing spikes.